지난 포스트 에서는 Fail2ban을 사용해 라즈베리파이의 SSH 보안을 강화해 봤습니다.

이번에는 Fail2ban에 이어 OTP 인증으로 SSH 보안을 강화해 봅시다.

Google Authenticator 설치

우리가 사용할 OTP 서비스는 Google의 Authenticator입니다.

아래 명령어로 설치 해 줍시다.

1
sudo apt-get install libpam-google-authenticator

OTP 설정

시작하기에 앞서, 만약 루트 게정으로 로그인되어 있다면 SSH를 사용할 사용자 계정으로 로그인 해야 합니다.

아래 명령어로 설치 프로그램을 실행해 줍니다.

1
google-authenticator

조금 기다리면 아래와 같이 Time based인 인증을 사용할 것인지 물어보는데, Y를 입력해 줍니다.

1
Do you want authentication tokens to be time-based (y/n)

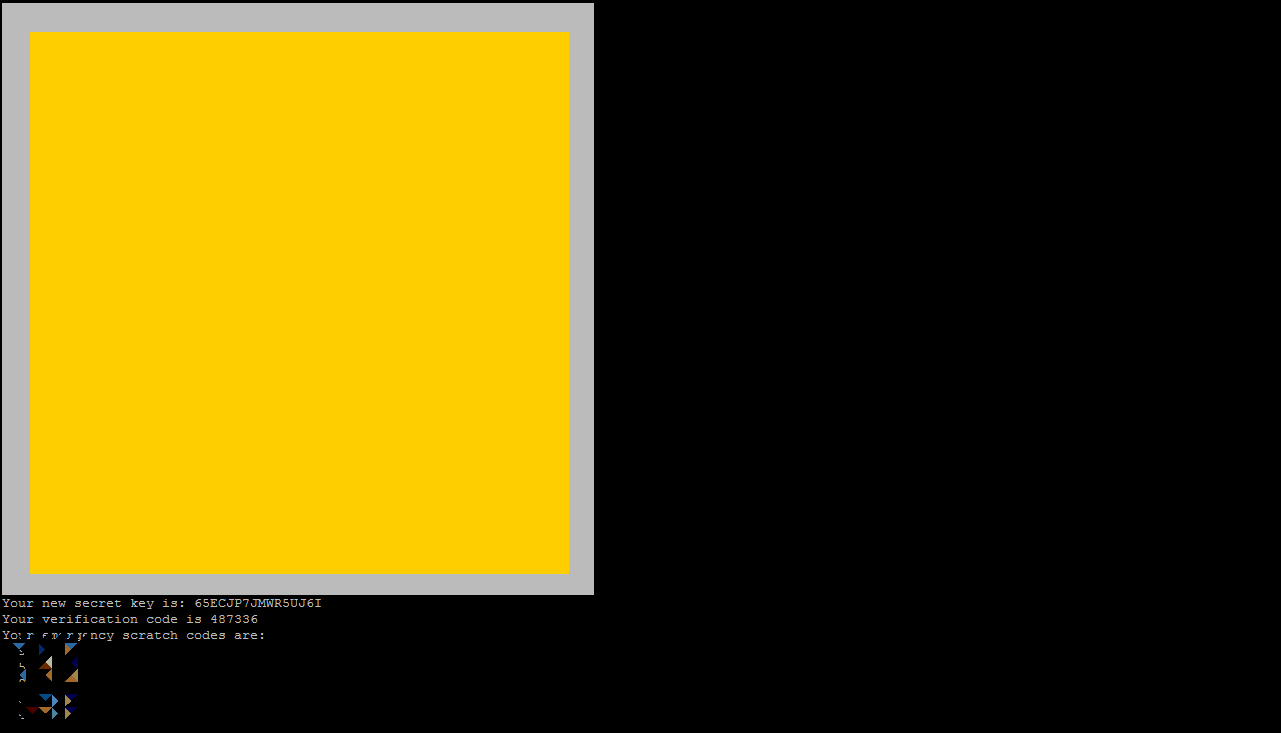
그럼 아래와 같이 QR코드와 복구 코드가 나옵니다.

이 정보는 다시 확인할 수 없으니, 안전한 곳에 기록해 줍시다.

OTP 설정 화면

▴ OTP 설정 화면

OTP 등록하기

OTP 코드를 생성하기 위해서는 코드를 생성해주는 앱이 필요합니다.

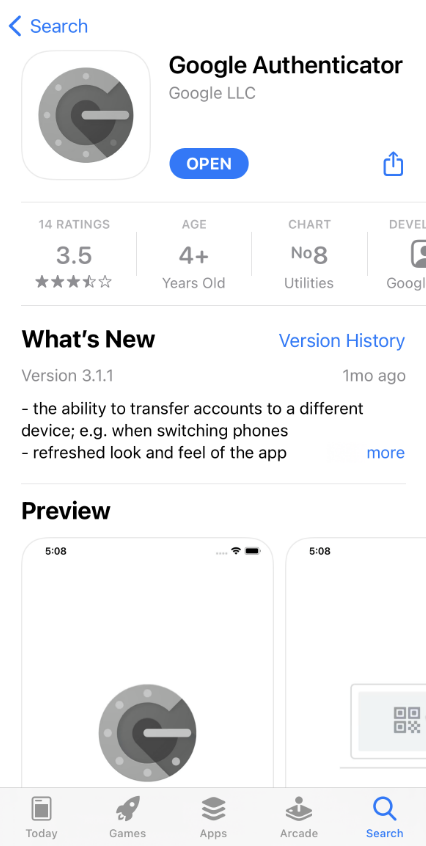
Apple App Store 또는 Google Play Store에서 Google Authenticator 앱을 설치합니다.

Google Authenticator 설치화면

▴ Google Authenticator 설치화면

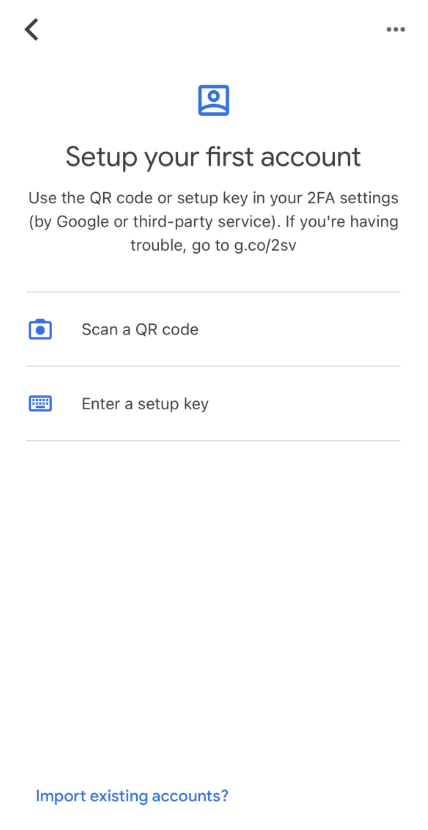
앱을 실행하면 아래와 같은 화면이 나올텐데, Scan QR code를 눌러 아까 콘솔에 출력된 QR코드를 스캔합니다.

Google Authenticator 실행 후 화면

▴ Google Authenticator 실행 후 화면

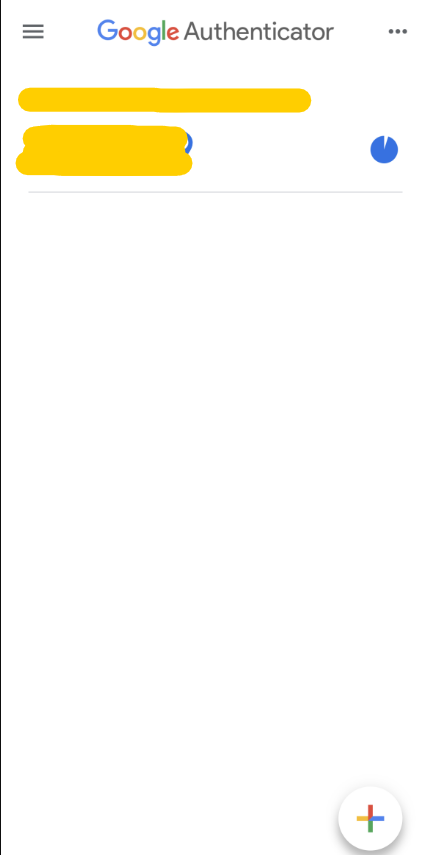
그러면 아래와 같이 OTP가 등록된 것을 확인할 수 있습니다

Google Authenticator OTP 등록 후 화면

▴ Google Authenticator OTP 등록 후 화면

서버측 설정

이제 서버측에서 해야 할 설정을 해봅시다.

아까 QR코드가 나왔던 콘솔을 보면 .google_authenticator 파일을 추가할 것인지 물어봅니다.

1
Do you want me to update your "/.google_authenticator" file? (y/n)

이 파일이 없으면 OTP가 작동을 하지 않으니 Y를 입력해 줍니다.

1
2
Do you want to disallow multiple uses of the same authentication token? This restricts you to one login about every 30s,
but it increases your chances to notice or even prevent man-in-the-middle attacks (y/n)

여러 사용자가 하나의 코드를 가지고 인증하는 것을 비활성화 할것인지 선택하는 설정입니다.

Man-in-the-middle attack (코드를 탈취해서 사용하는 공격) 을 막아주니 Y를 입력해 기능을 비활성화 하는 것을 추천합니다.

1
2
3
4
5
6
By default, a new token is generated every 30 seconds by the mobile app. In order to compensate for possible time-skew
between the client and the server, we allow an extra token before and after the current time.
This allows for a time skew of up to 30 seconds between authentication server and client.
If you experience problems with poor time synchronization, you can increase the window from its default size of 3 permitted
codes (one previous code, the current code, the next code) to 17 permitted codes (the 8 previous codes, the current code, and the 8 next codes).
This will permit for a time skew of up to 4 minutes between client and server. Do you want to do so? (y/n)

OTP 토큰은 30초마다 초기화 되지만 서버의 시간 동기화 문제로 토큰 주기가 안 맞는 상황이 발생할 수 있으니,

이런 현상을 방지하기 위해 이전 코드와 다음 코드로도 인증이 가능하게 설정하는 항목입니다.

보안을 위해서라면 사용하지 않는 것을 추천합니다.

1
2
3
If the computer that you are logging into isn't hardened against brute-force login attempts, you can enable rate-limiting
for the authentication module. By default, this limits attackers to no more than 3 login attempts every 30s.
Do you wantto enable rate-limiting? (y/n)

사용자가 코드를 3번 이상 틀리면 차단하는 기능입니다.

자신이 원하는 대로 설정하면 됩니다.

SSH 설정

이제 SSH에서 OTP 인증을 사용할 수 있도록 설정합시다.

1
sudo nano /etc/pam.d/sshd

설정 파일을 열고, 아래로 내리다 보면 @include common-password가 보일겁니다.

바로 밑에 아래 항목을 추가해 줍니다.

1
auth required pam_google_authenticator.so
1
sudo nano /etc/ssh/sshd_config

그런 다음 SSH 설정파일을 열고, 아래 항목을 찾아 yes로 바꿔줍니다.

1
ChallengeResponseAuthentication no
1
sudo service sshd restart

sshd를 재시작 합니다.

작동 확인

이제 다시 서버에 SSH로 접속해봅시다.

Password를 물어본 다음 Verification code를 물어본다면 성공입니다.

설정한 OTP앱의 코드를 입력하면 로그인이 됩니다.